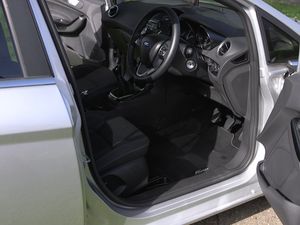
Here’s how to clean your car’s interior
Fancy saving yourself some money by cleaning your car’s interior yourself? It might take a bit longer, but our step-by-step guide and video will have your interior looking ‘as new’ in no time

For many, a clean exterior is of more value than the interior. Most of us, probably without admitting it, would rather the outside of our cars were lovely and shiny for others to see, but allow the inside of our cars to turn into a tip.
If you have a look inside some cars, they’re littered with empty crisp packets, water bottles and coffee cups, and the end result can be anything from mildly distasteful to borderline hazardous.
The problem is many think that taking a bin bag to the car and giving it a quick five-minute vacuum qualifies for an interior clean, but to get the cabin of your car looking its best, a little extra effort is generally required.
Handily this step-by-step guide will have your interior spick and span in no time.
1. The first step is to empty it of any rubbish, whether that be unwanted receipts, sweet wrappers or empty bottles. Whatever it is, just take a bin bag and fill it with anything you no longer need in your car.

2. One of the main errors most make is not taking the mats out of the car when cleaning it. While mats are great at covering the floor beneath, bits of dirt and stones always get trapped underneath. Take the mats out.
3. Clean the mats outside of the car. This could be by taking them into your house to clean, or you can even lay down a blanket on the floor and clean the mats at the roadside. It sounds picky, but there’s absolutely no point going to the bother of cleaning a mat if the underneath is covered in stones.

4. Next, thoroughly vacuum the entire car. Move the seats backwards and forwards to access all areas, including down the side of the seats, too, where a lot of dirt gets trapped. Try and get in every nook and cranny.
5. Spray an interior shampoo/cleaner on all fabric surfaces (including the mats) and scrub the carpets to extract any dirt. Wet vacs (that extract dirt by machine) can be used, but are only really needed on heavily soiled interiors.

6. Next, the pedals – an area most overlook. Wet the pedals and get a stiff, damp brush to extract the dirt. It’s amazing what hides on them.

7. Time to tackle any trim. On any soiled or muddy plastic trim, use a general trim cleaner and spray it on the affected area and wipe off.

8. Leather next. Use a leather cleaner and spray it on the surface. Use a damp cloth to scrub the leather, before leaving it for a few minutes and wiping any remaining residue with a clean dry cloth. For particularly dirty areas – driver’s seat, steering wheel, etc, you can use a leather brush to help with this.
9. Time to tackle the rest of the car. Use a trim cleaner/ dressing to go over any plastics – the door cards, dashboard, any cup holders, dash buttons. Spray this on a cloth and wipe over, before removing any remaining product not long after with a new clean cloth. You can even use special interior brushes to help get out any dust that gets trapped in any areas such as air vents and between buttons.

10. Don’t forget the door shuts and boot shuts. If these are heavily soiled it’s best to clean them with soapy water and dry them, but if there’s only light dirt on them, you can do this with the same interior cleaner already used on the interior.

11. Glass is important too. Use a dedicated car glass cleaner and glass cloth for optimum results.
12. It might seem like a faff, but go around and give the car a quick vac again – it’s amazing the amount of dust you’ll have picked up from the interior when you’ve properly cleaned it.
13. Put the mats back in.
14. Not everyone likes an air freshener, but if you like the smell of them, put one in to help it keep things fresh.

And there you have it – one clean interior.
It might have taken you a while, but we guarantee if you followed our step-by-step guide, you’ll have a spotless interior – the sort you’ll never get from a quick whizz through with a vacuum. We guarantee that the effort is worth it.


